Intake Manifold & Actuator Membranes (Diaphragms) — Repair Kits & Replacement Parts
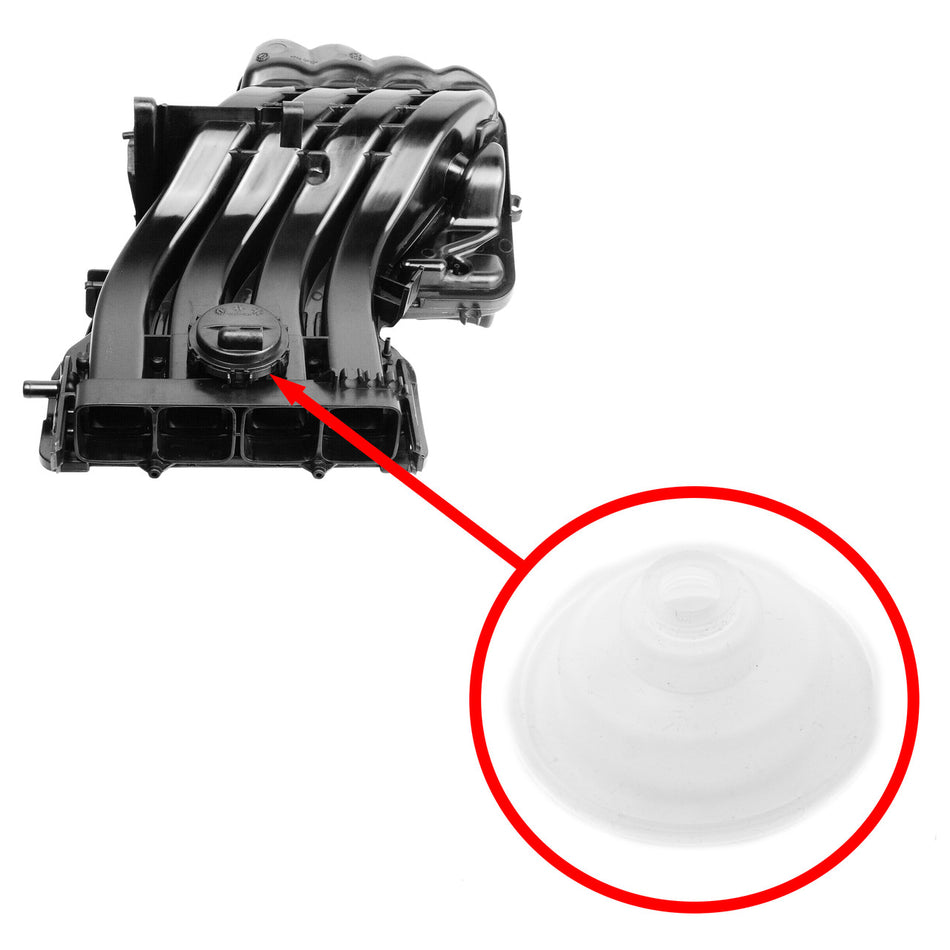
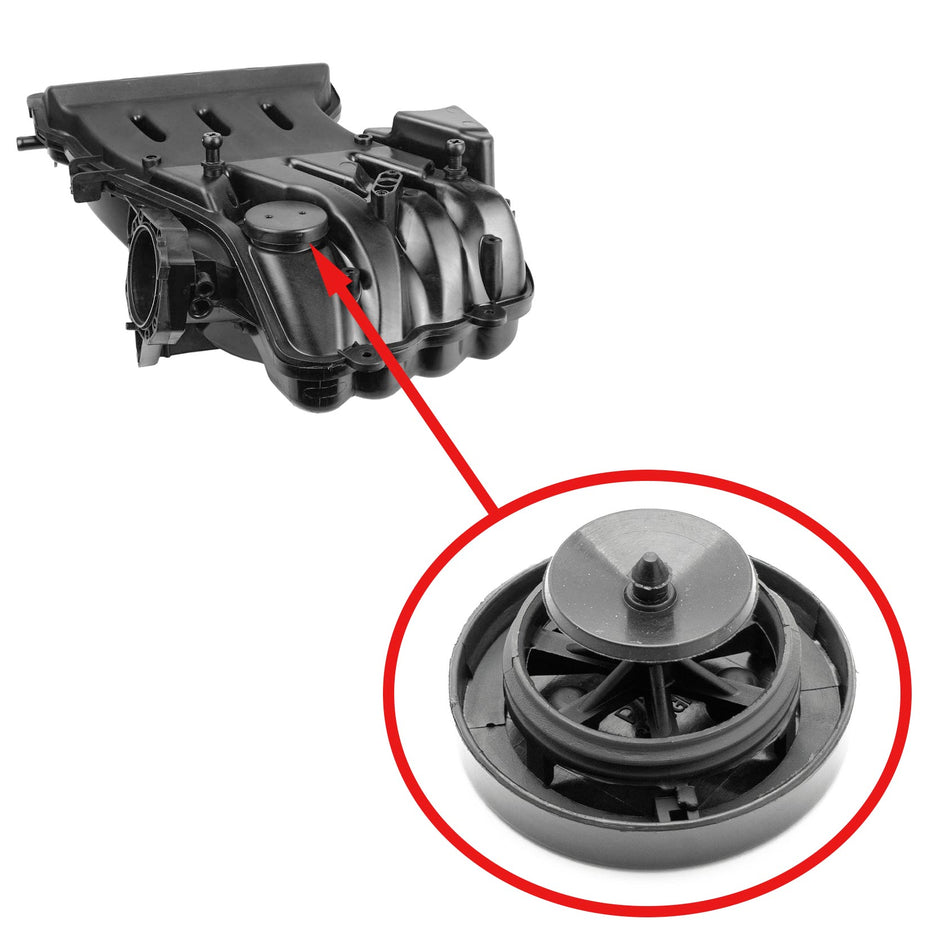
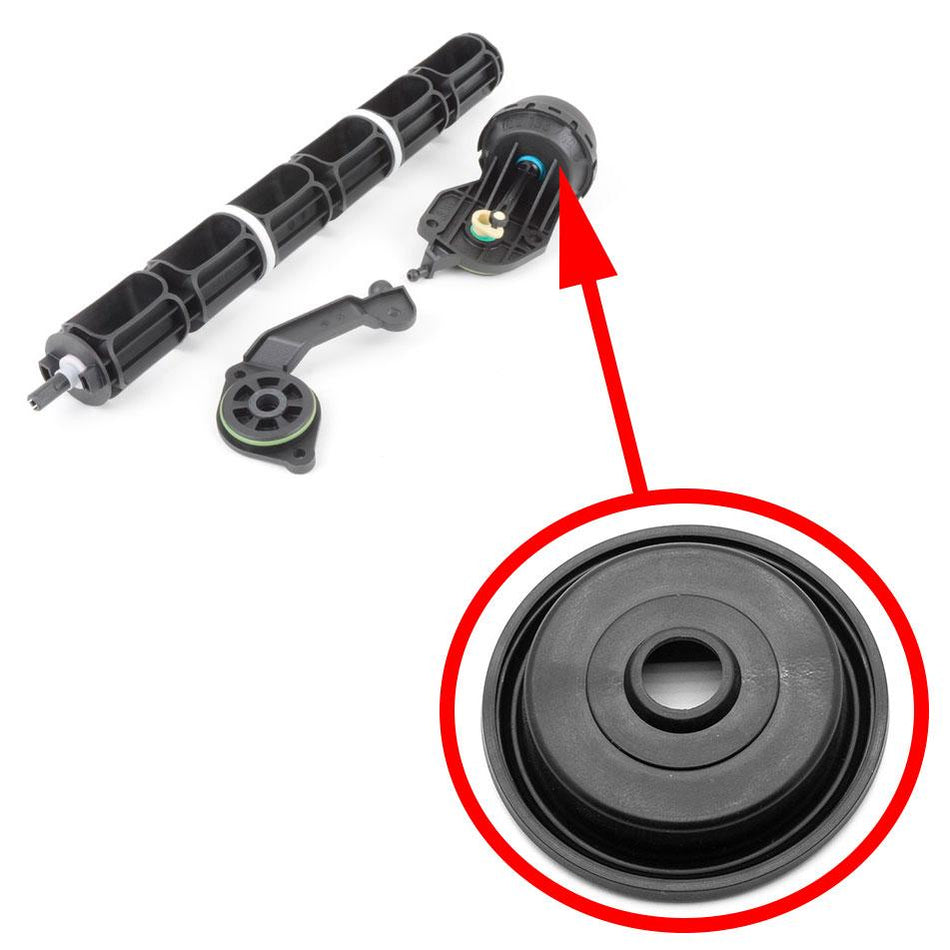
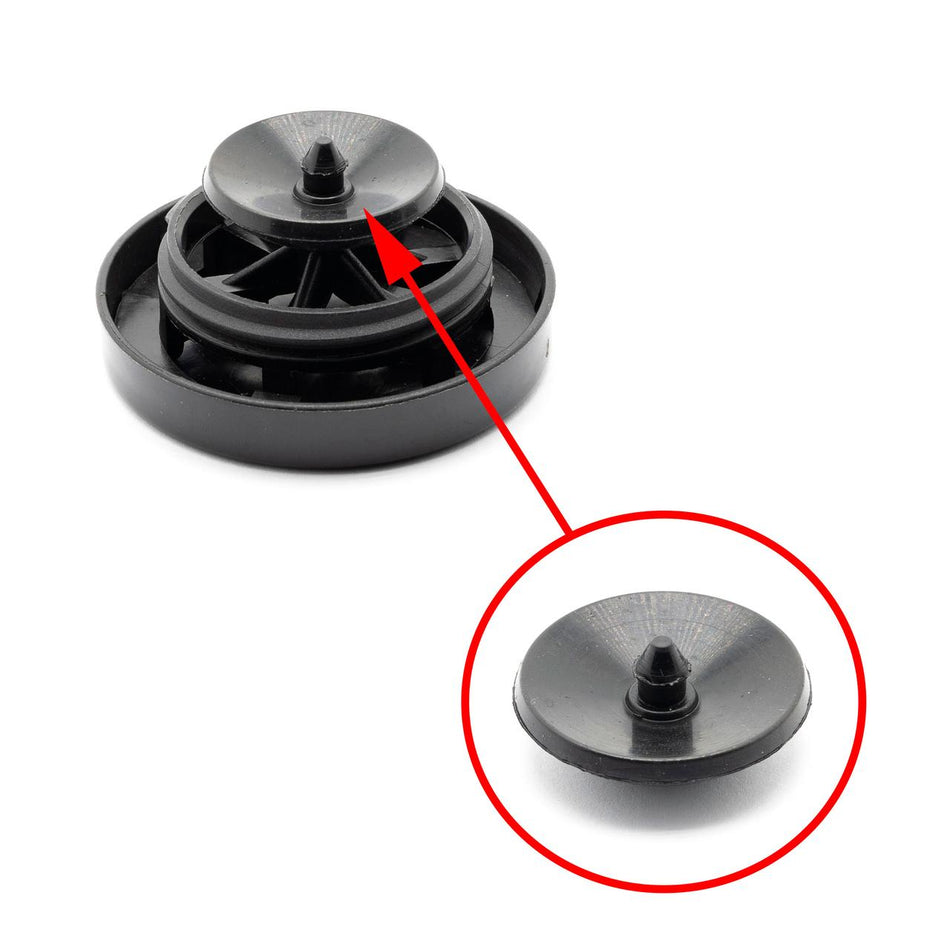
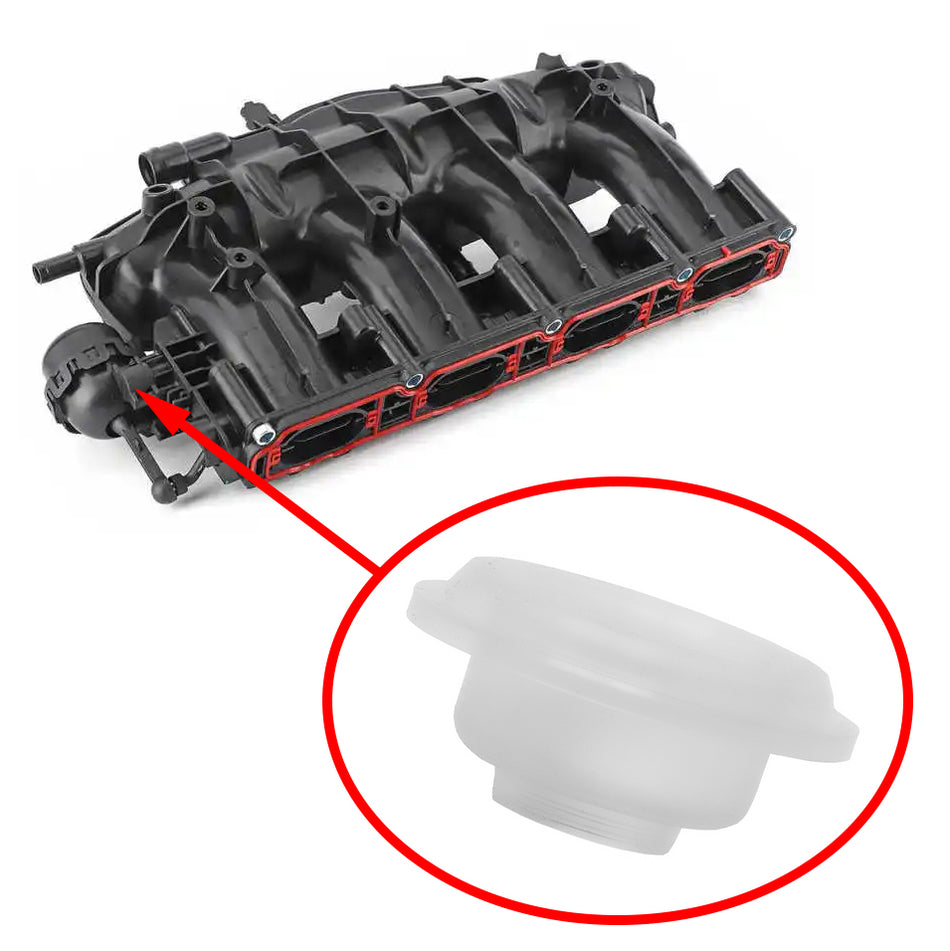
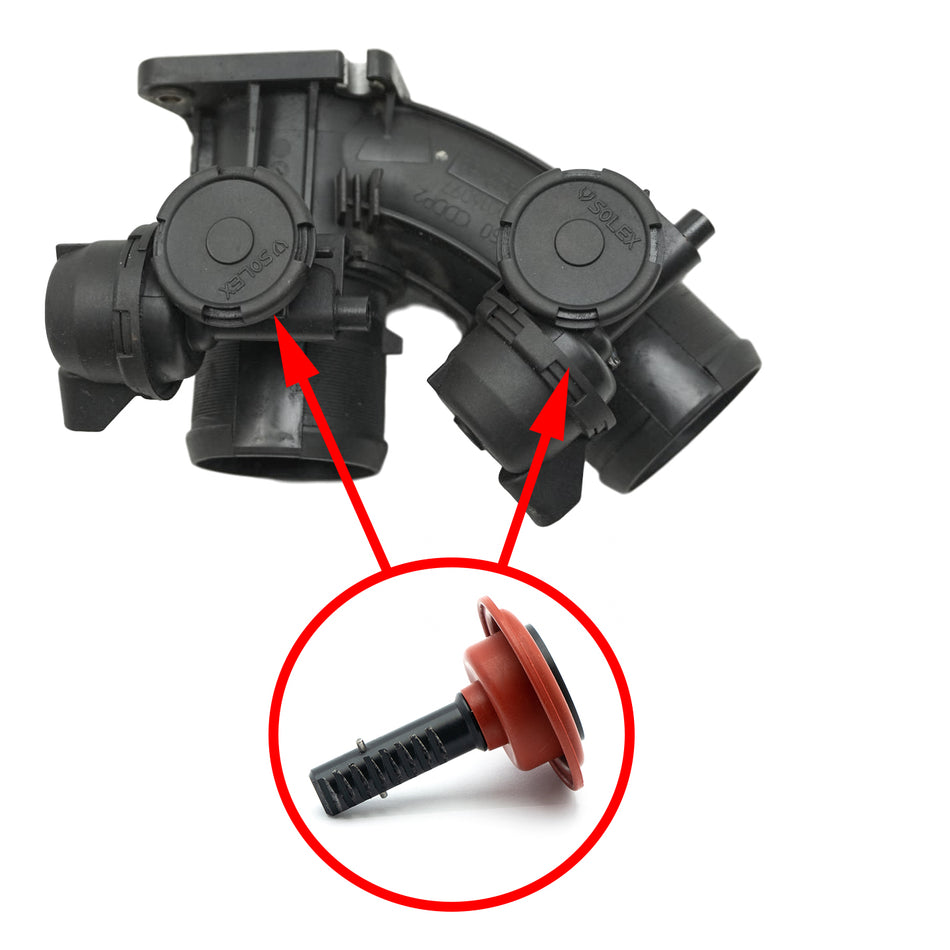
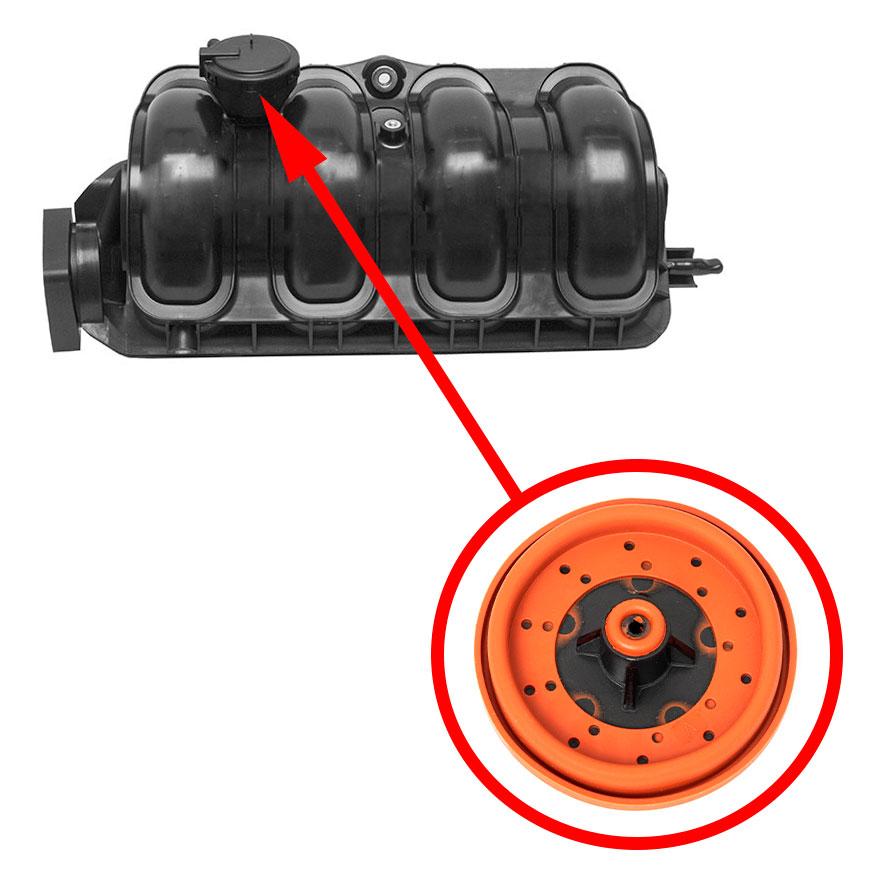
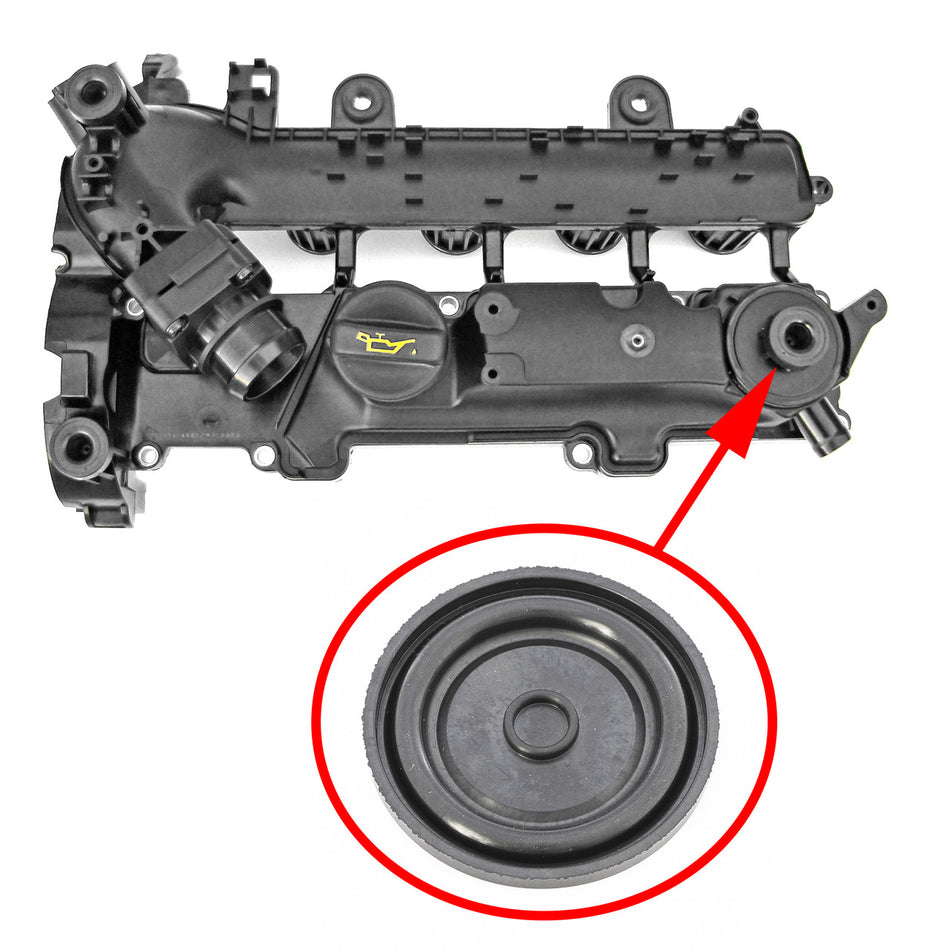
The intake manifold actuator membrane is a serviceable sealing element inside vacuum actuators that positions intake runner flaps or vanes. A membrane leak establishes a controlled leakage path that degrades actuator hold characteristics and causes airflow control faults. Targeted membrane replacement restores sealing and actuator performance when the actuator housing and linkage are serviceable:
-
Confirm fitment by OE/part number, actuator variant, and engine code.
-
Addresses vacuum-leaks and runner-position faults presenting as torque loss, hesitation, or actuator drift.
-
Intended for professional technicians and experienced DIYers with bench-test capability.
Need fitment help? Provide VIN + engine code + actuator photos
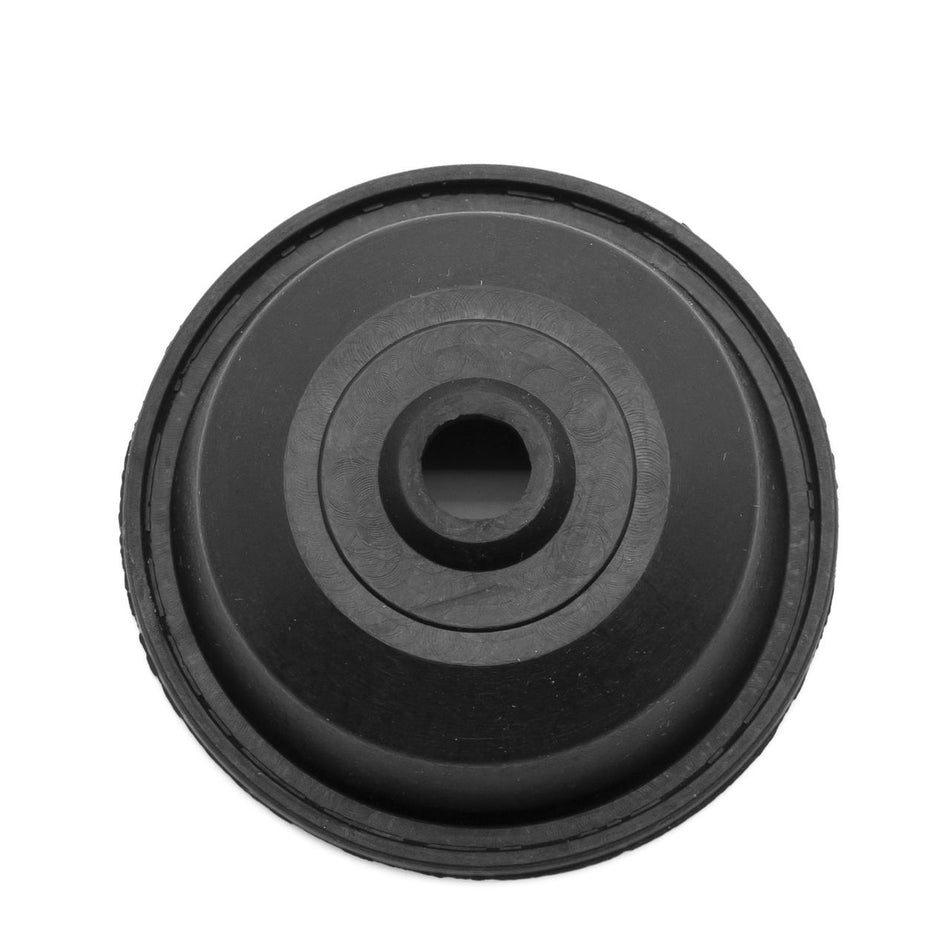
What Is an Intake Manifold Diaphragm (Membrane)?
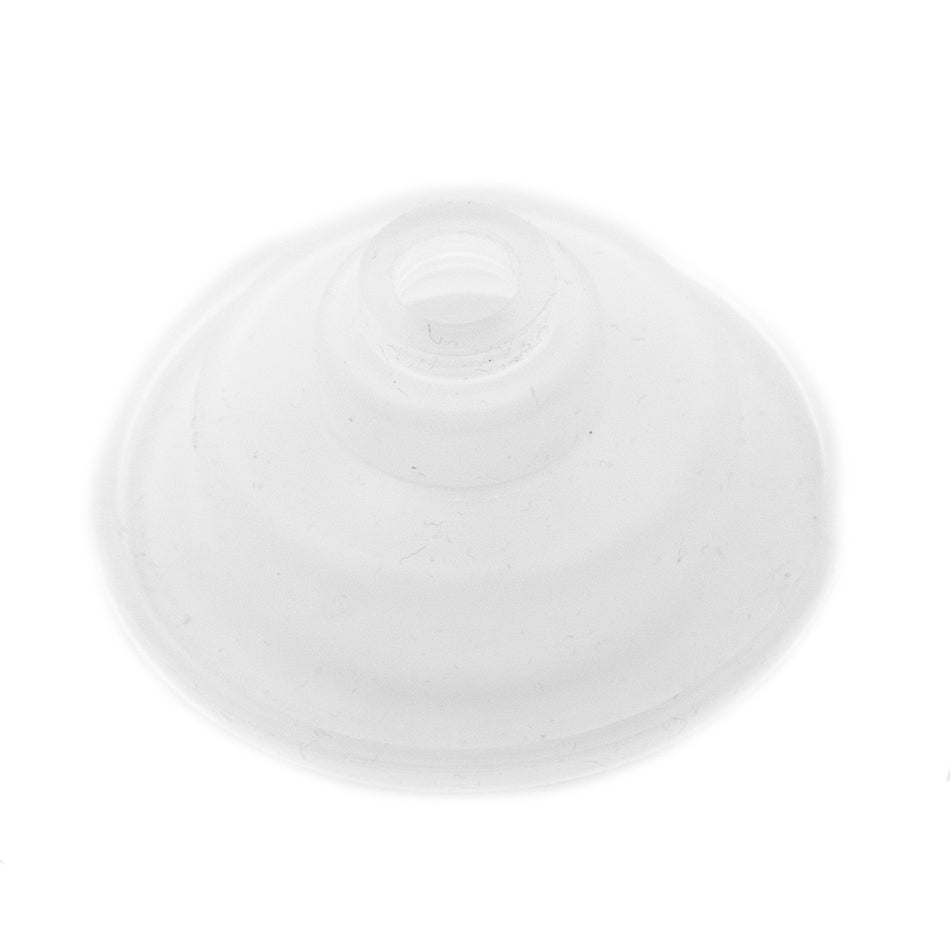
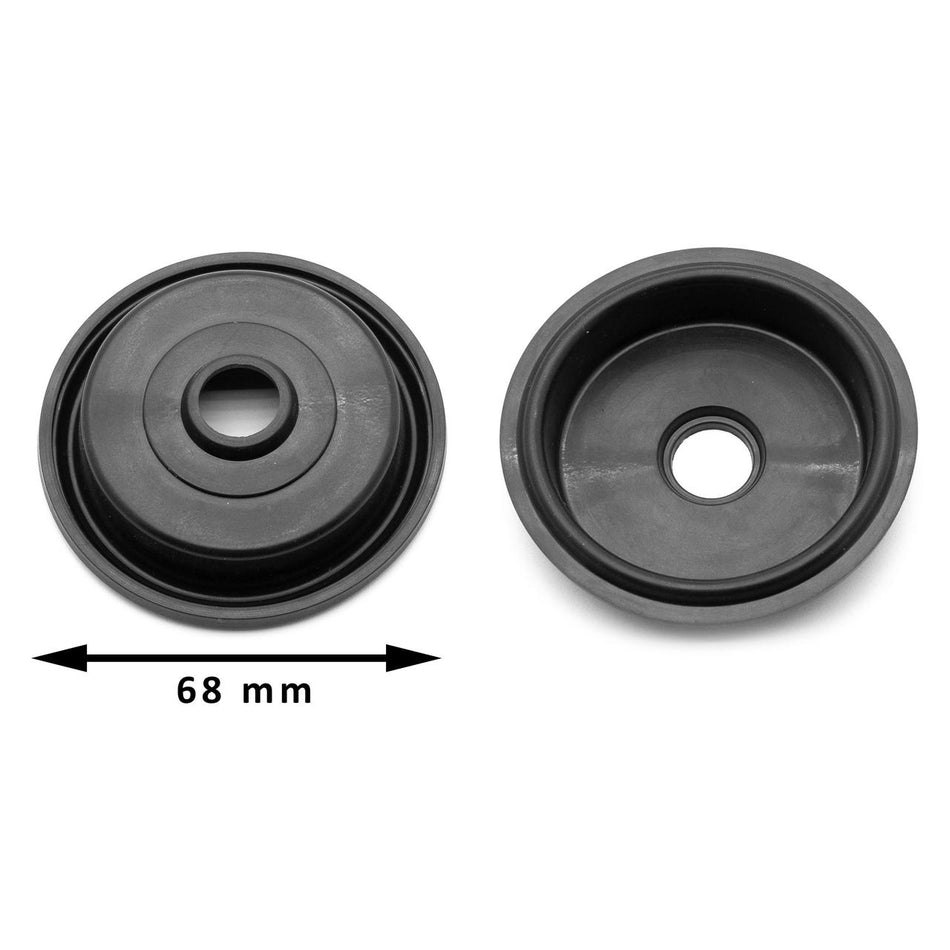
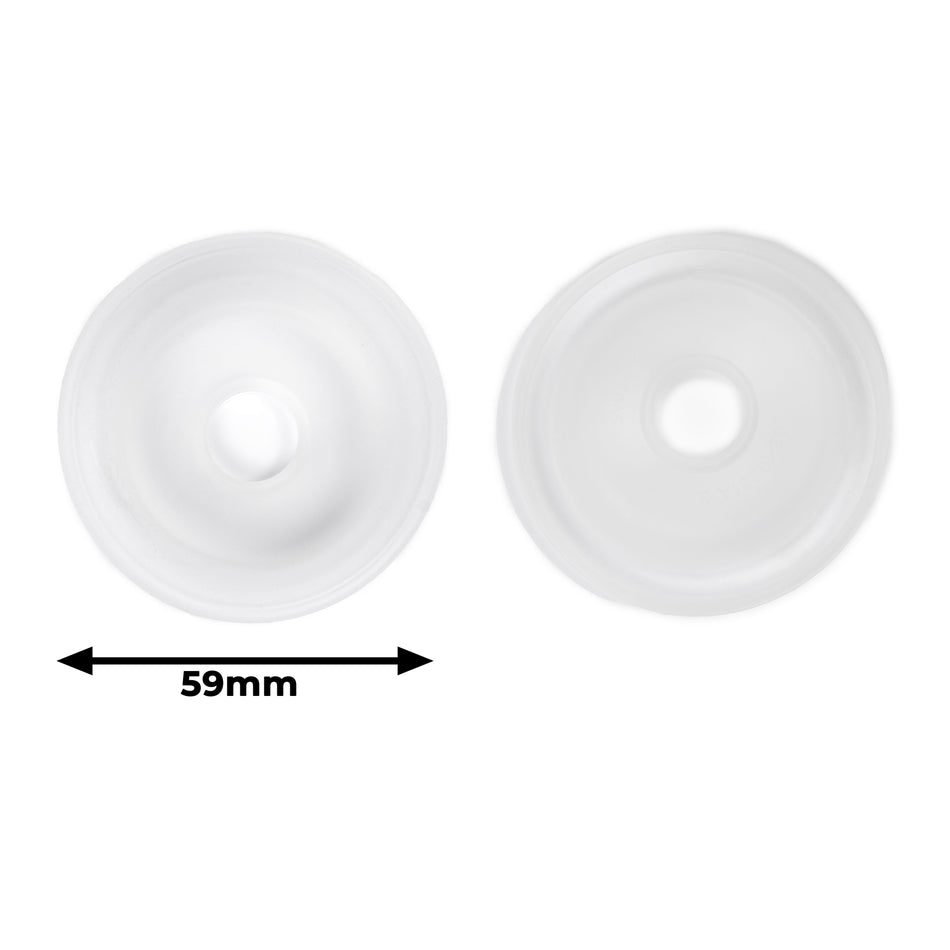
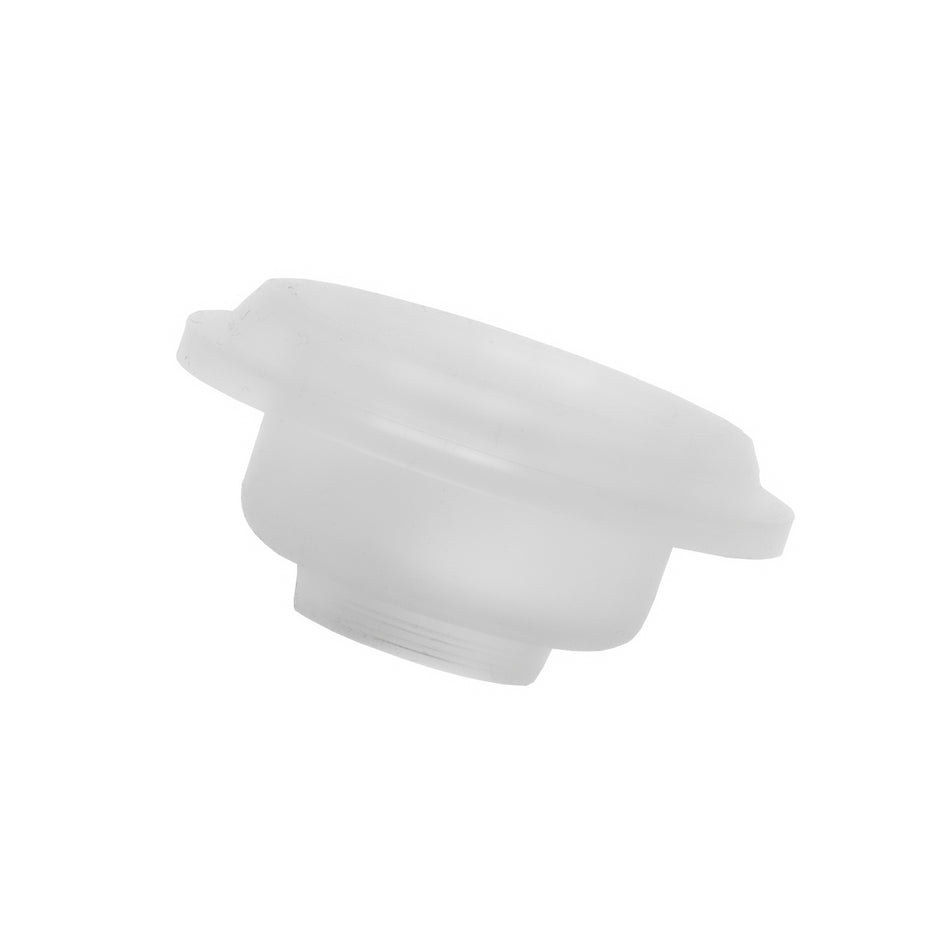
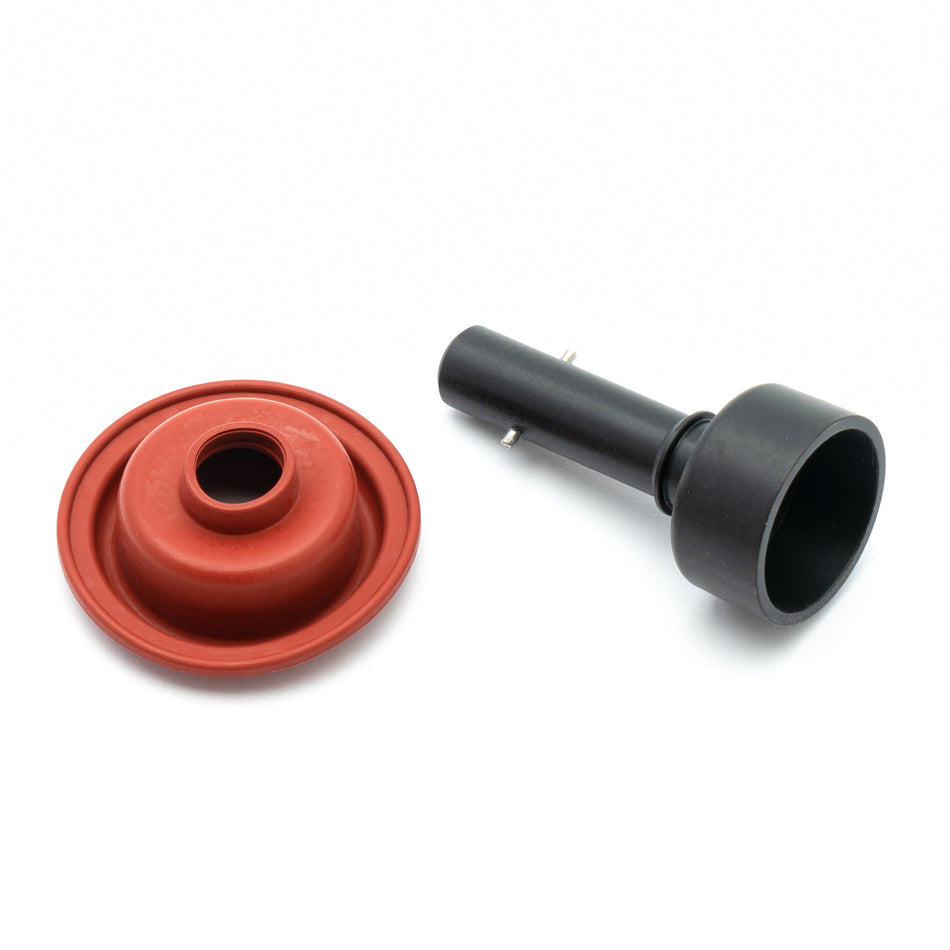
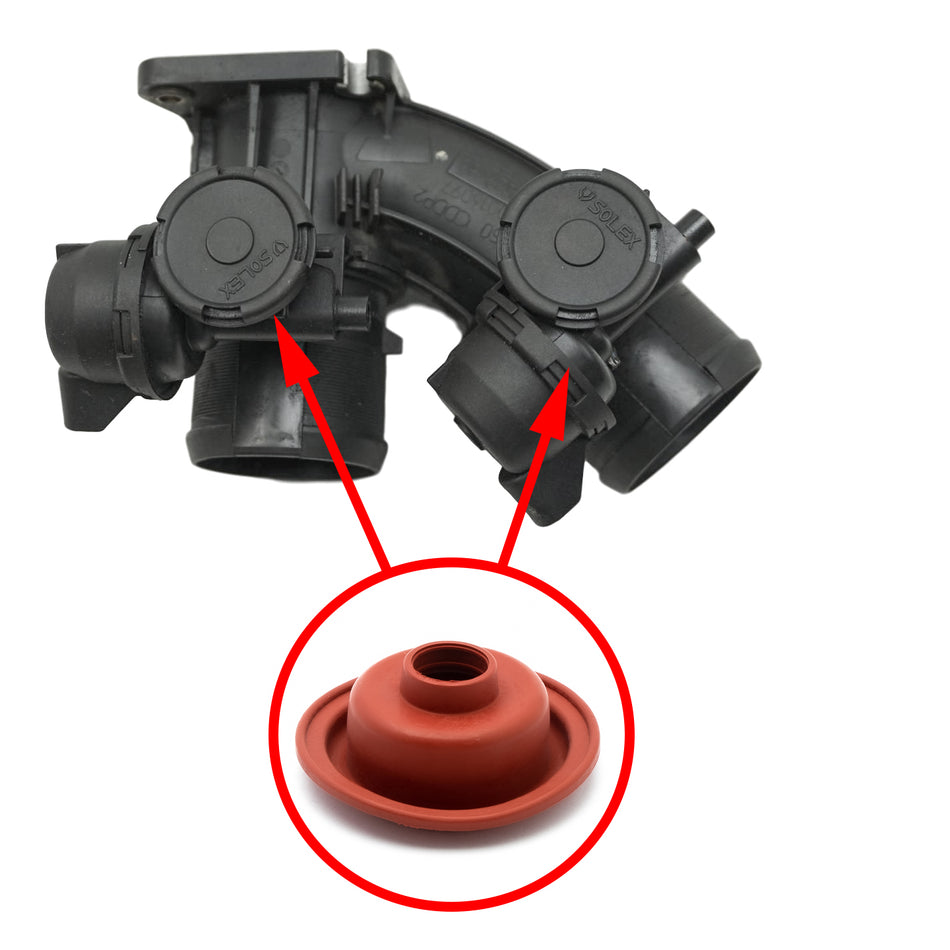
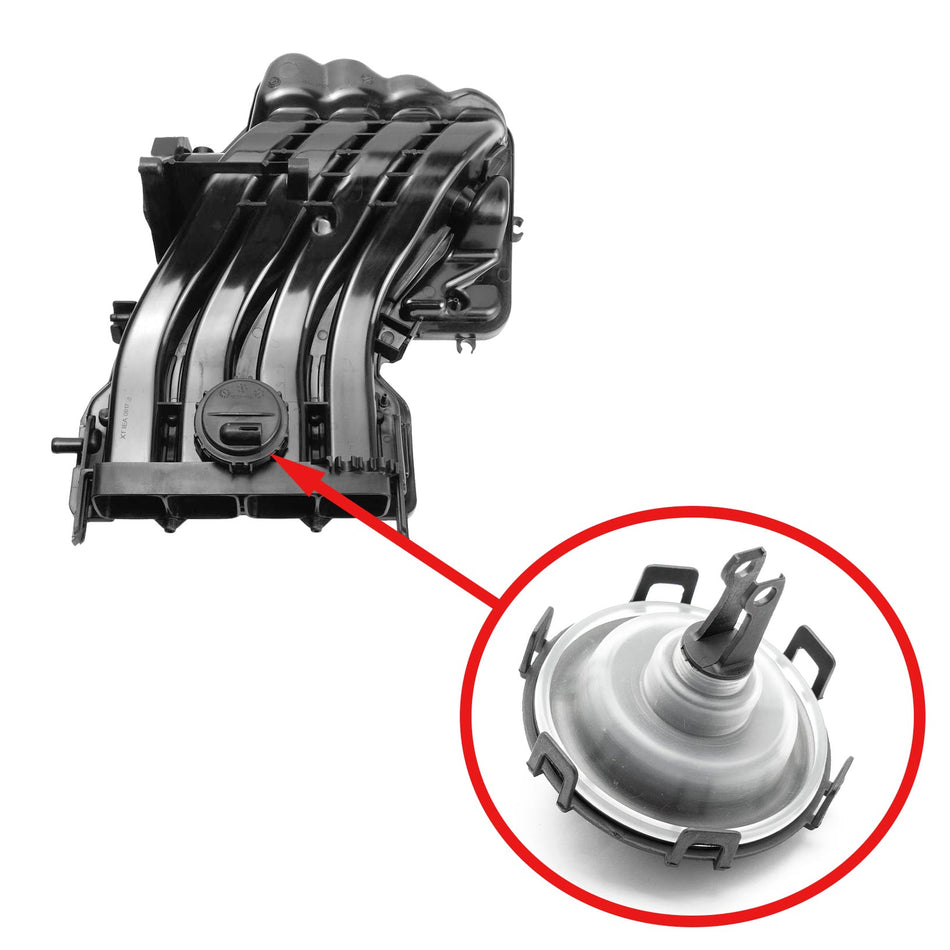
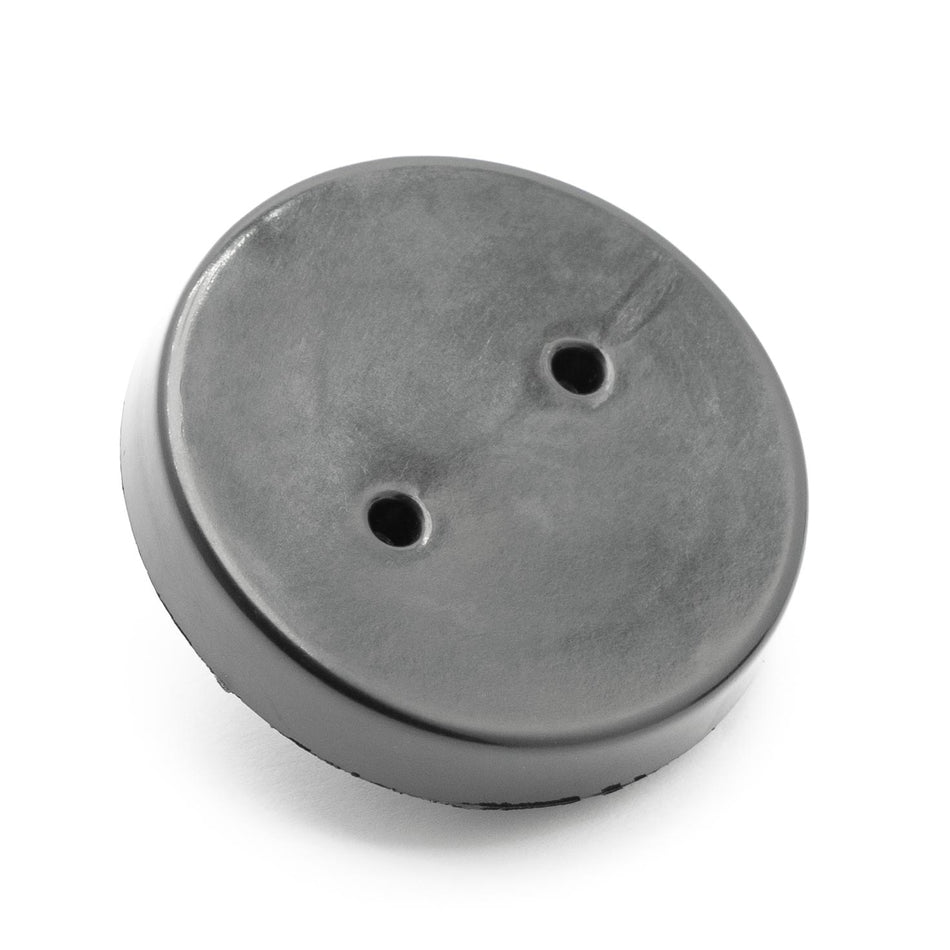
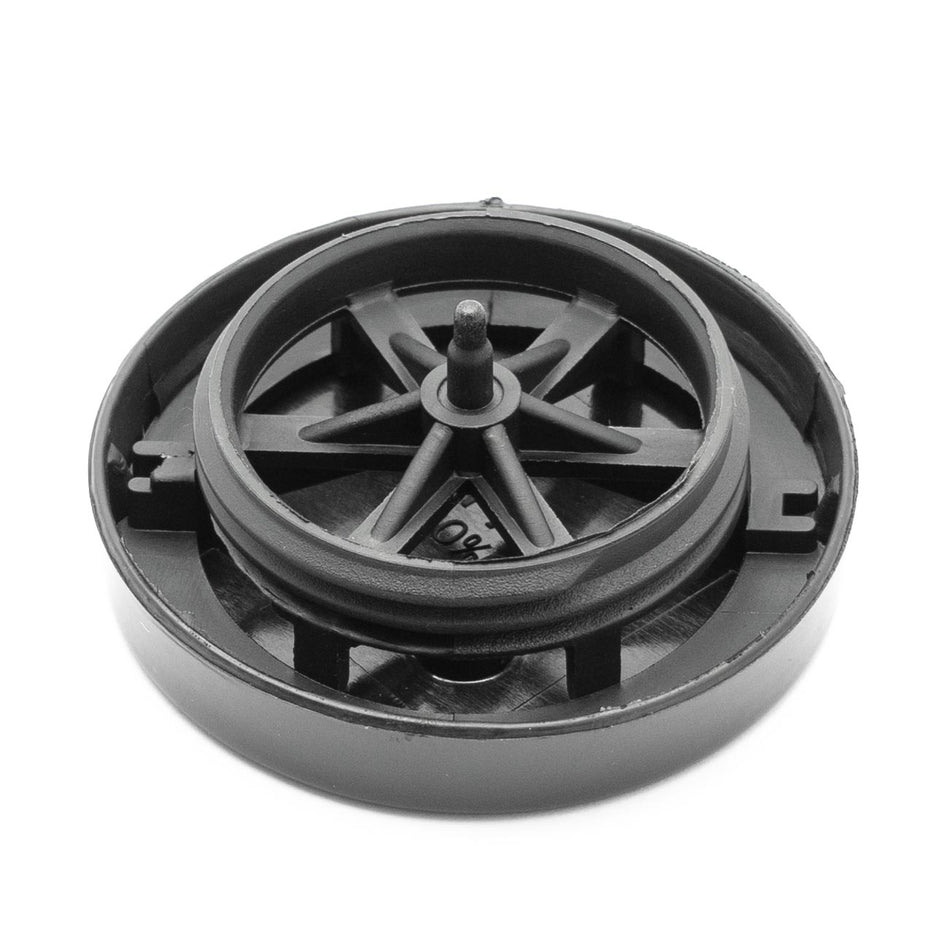
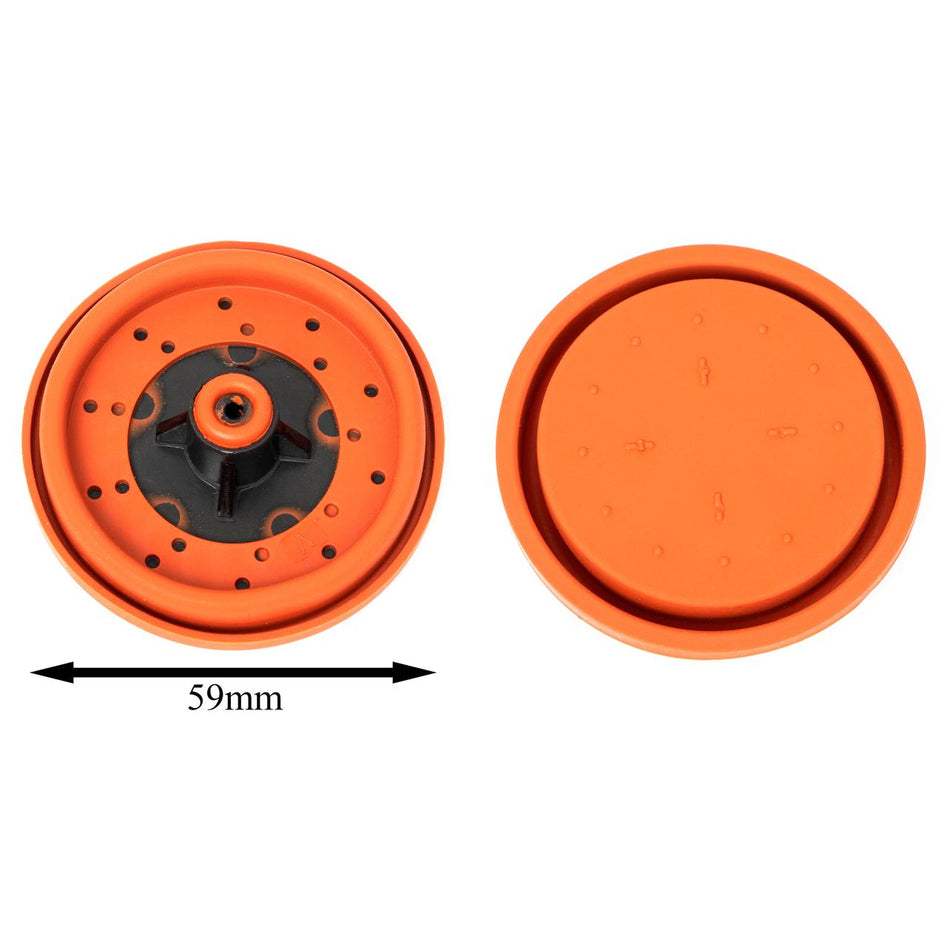
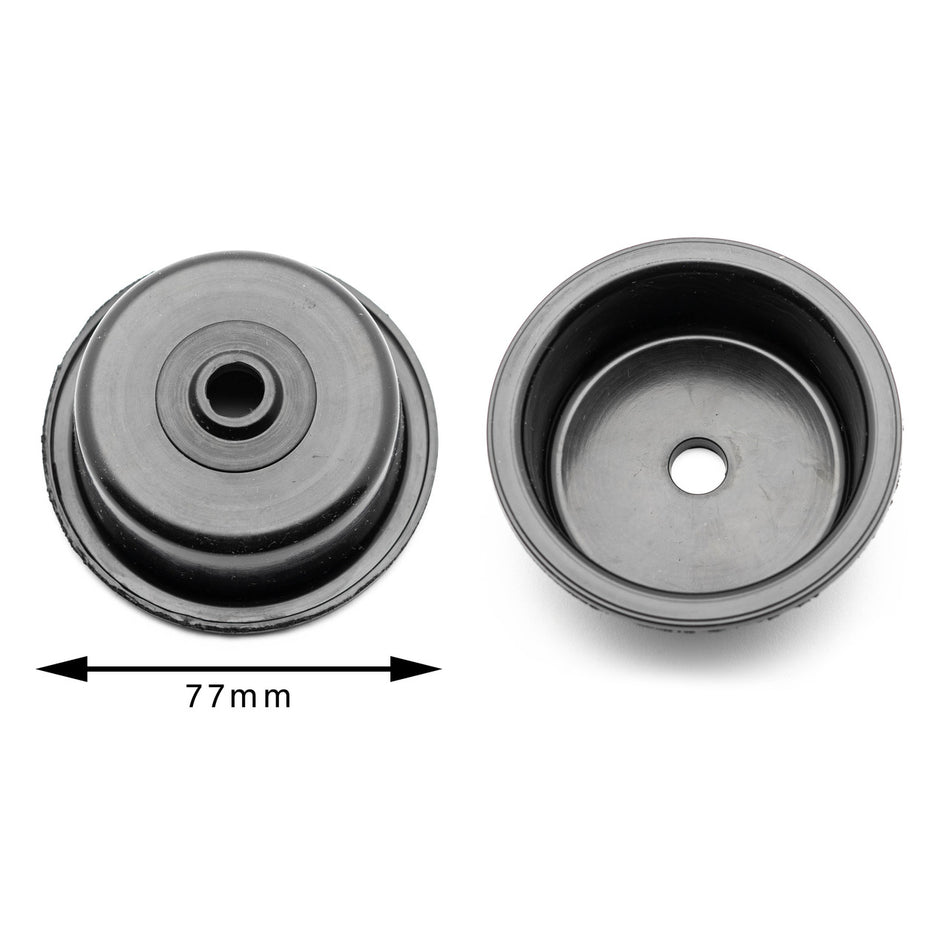
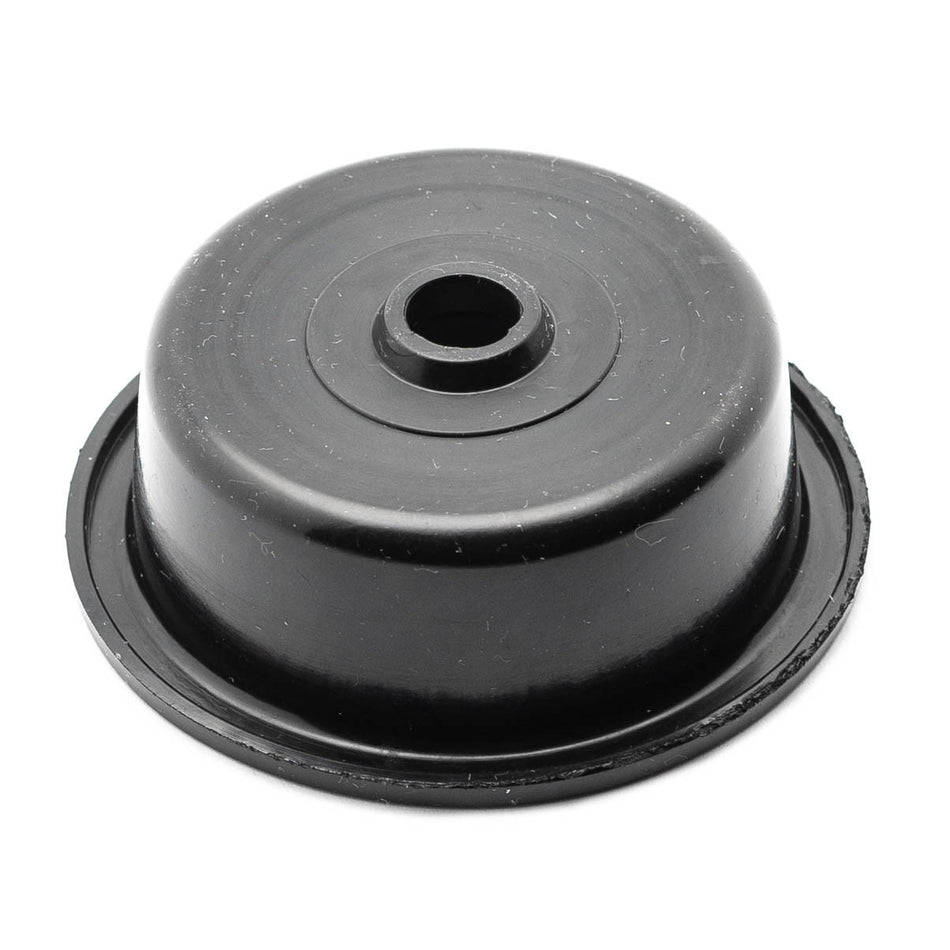
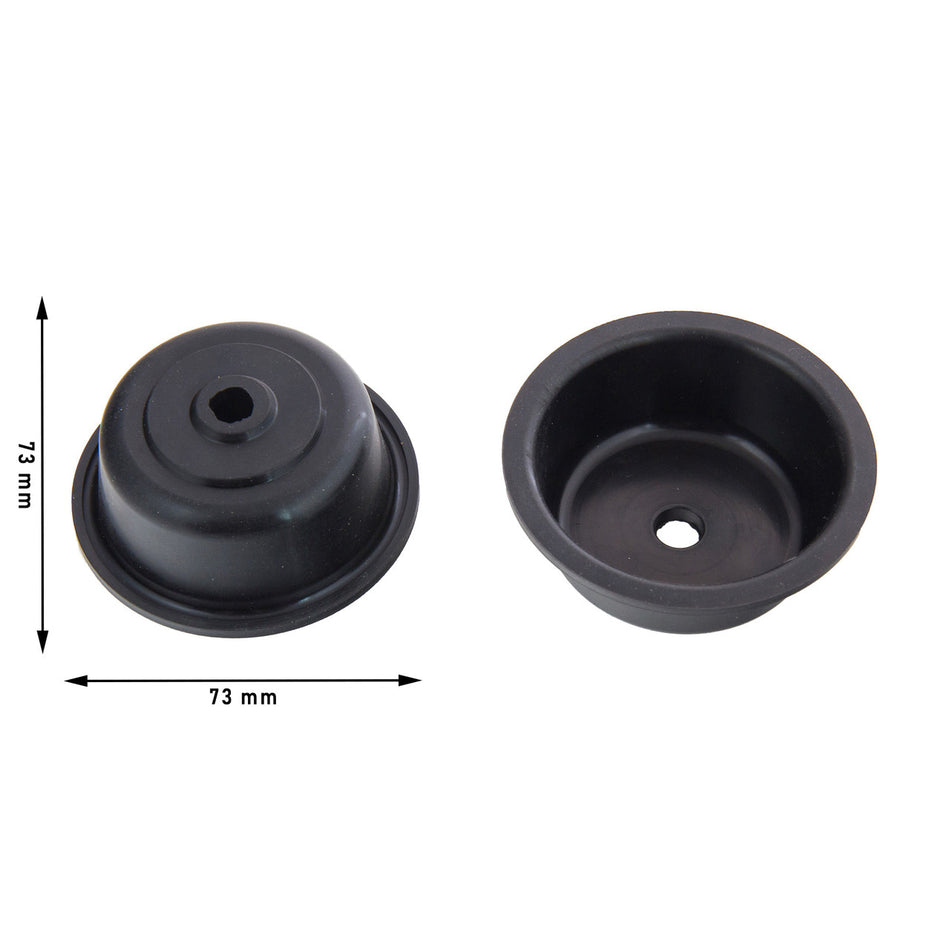
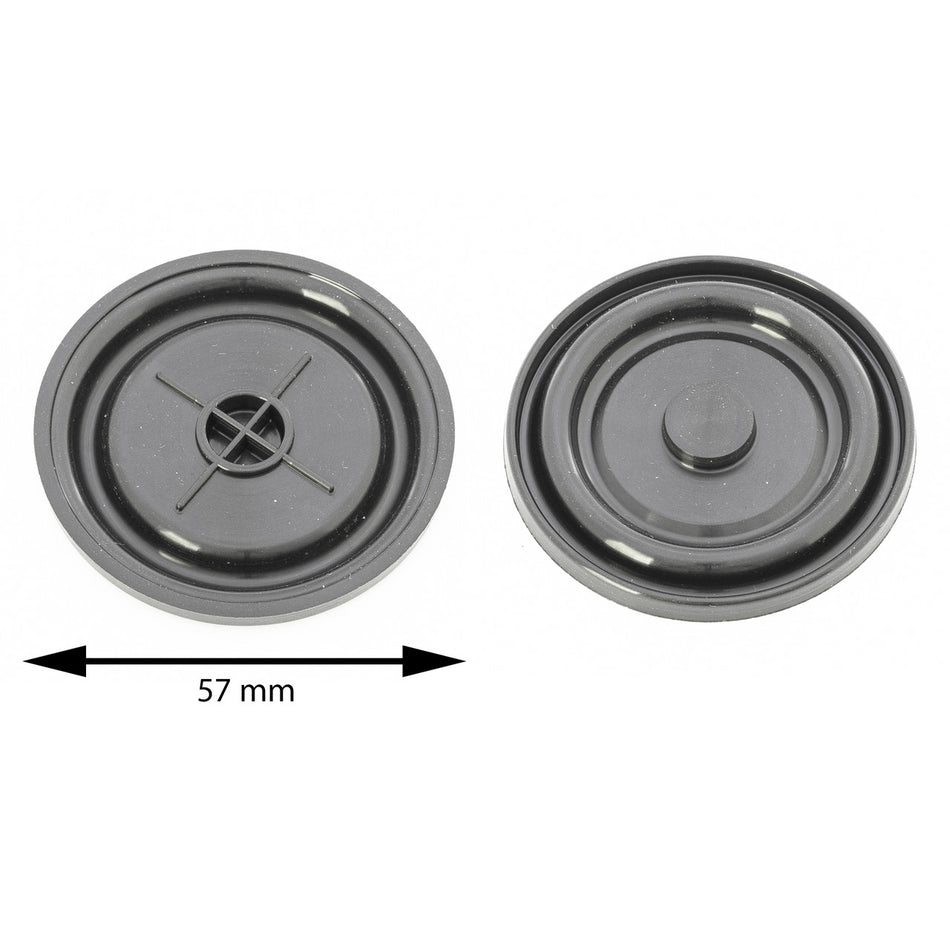
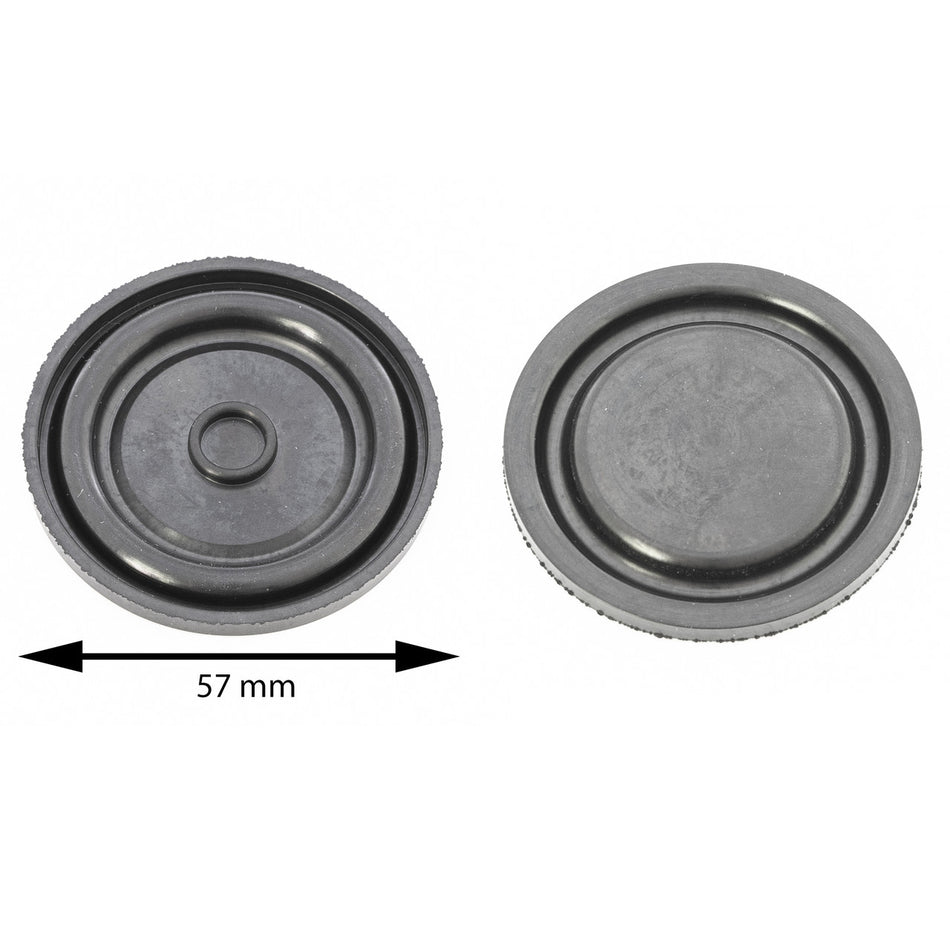
The intake manifold diaphragm is an elastomeric or fabric-reinforced membrane that separates pressure chambers in a vacuum actuator. It converts applied vacuum into linear motion transmitted to pushrods or levers that drive flaps or runners. Diaphragm geometry and retaining method differ across actuator families; correct material and revision matching are essential for long-term function.
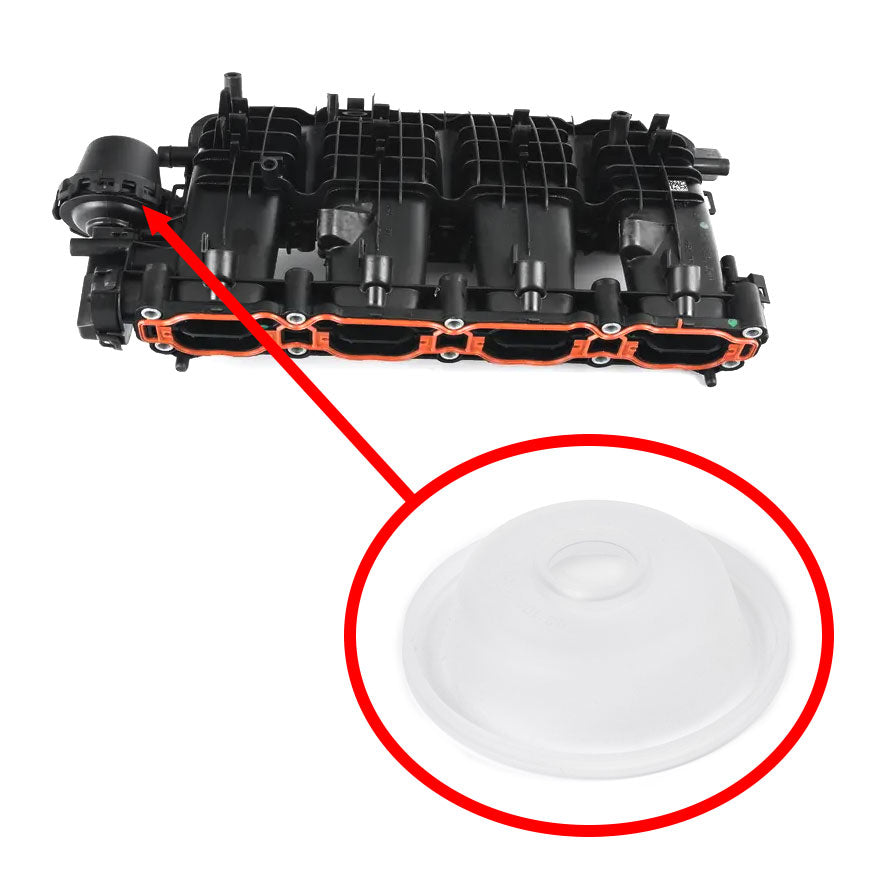
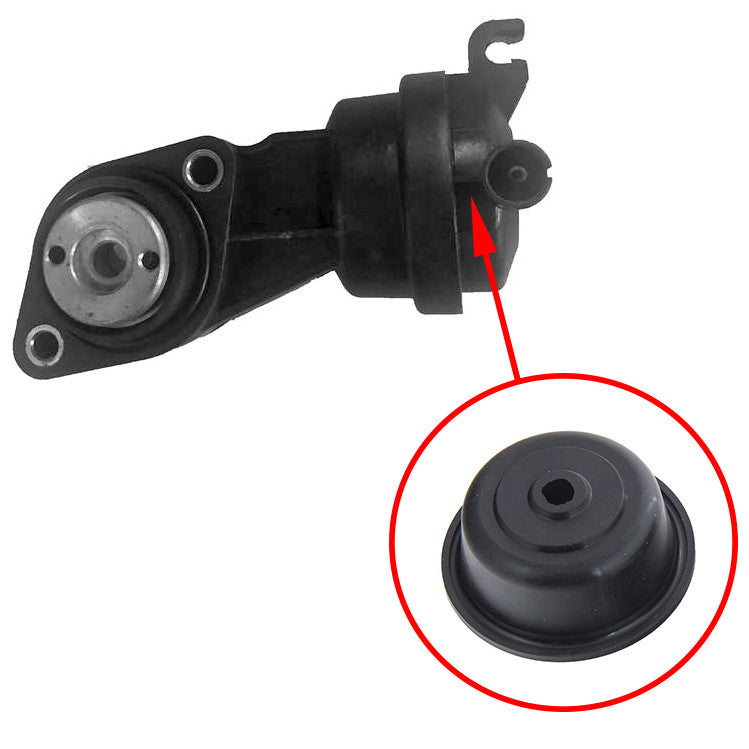
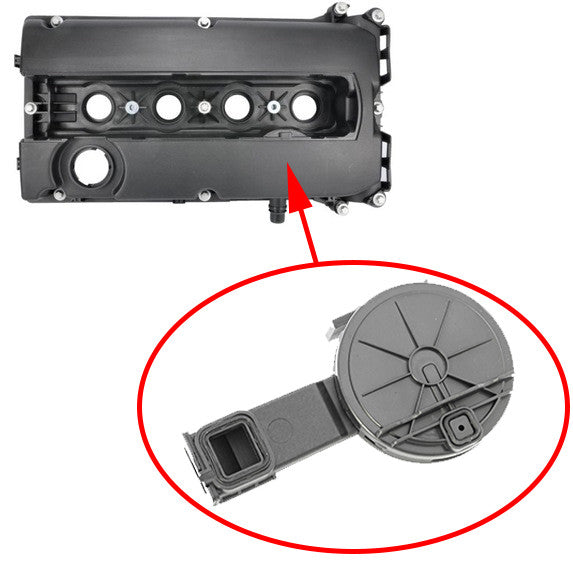
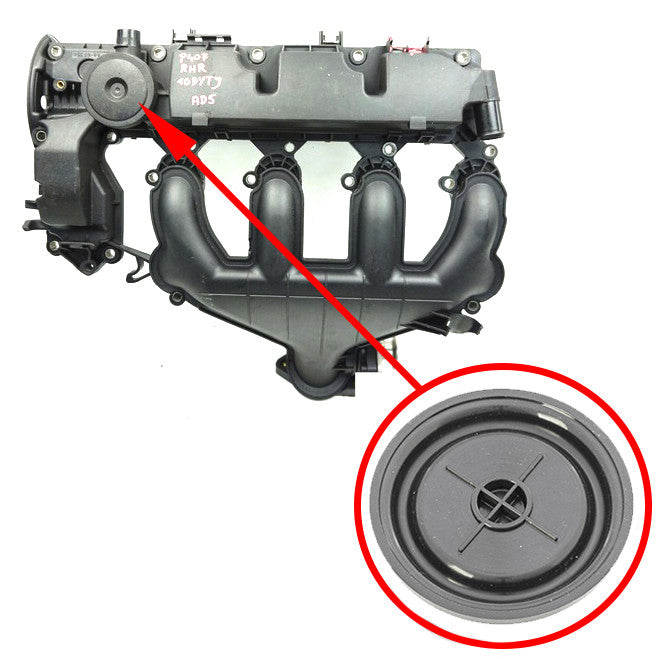
Intake Manifold Actuator Systems (Runner Flaps, DISA/IMRC) — How They Work
Many modern engines use variable intake manifold geometry to balance low-speed torque with high-RPM flow. Systems you will encounter include DISA, IMRC, and other runner flap arrangements.
Intake Runner Actuator / Manifold Flap Control
Actuators route air via short or long paths by opening/closing flaps or redirecting runners. Short paths favour high-RPM response, and long paths increase low-end torque. ECU logic commands the actuator based on RPM, load, and throttle position, while feedback sensors report the actual position where fitted.
Vacuum Actuator Membrane Role
The membrane creates the pressure differential that actually moves the linkage. If the intake manifold membrane leaks, the actuator may not hold its position or may move slowly or erratically. Vacuum source, hoses, and the membrane itself must all be sound for reliable operation.
Symptoms of a Torn Actuator Membrane
Rough idle or hunting, hesitation at certain RPMs, and loss of low-end torque often indicate a failed membrane. Use this symptom map to focus your checks:
-
Rough idle or hunting: vacuum leak at the actuator diaphragm.
-
Hesitation or a flat spot at specific RPM bands: flaps not moving as commanded.
-
Reduced low-end torque: runner control stuck closed or open.
-
Whistling or hissing: a vacuum leak at the diaphragm or hose connection.
-
Check Engine light: actuator position or airflow control out of range.
What Causes Intake Manifold Membranes to Fail?
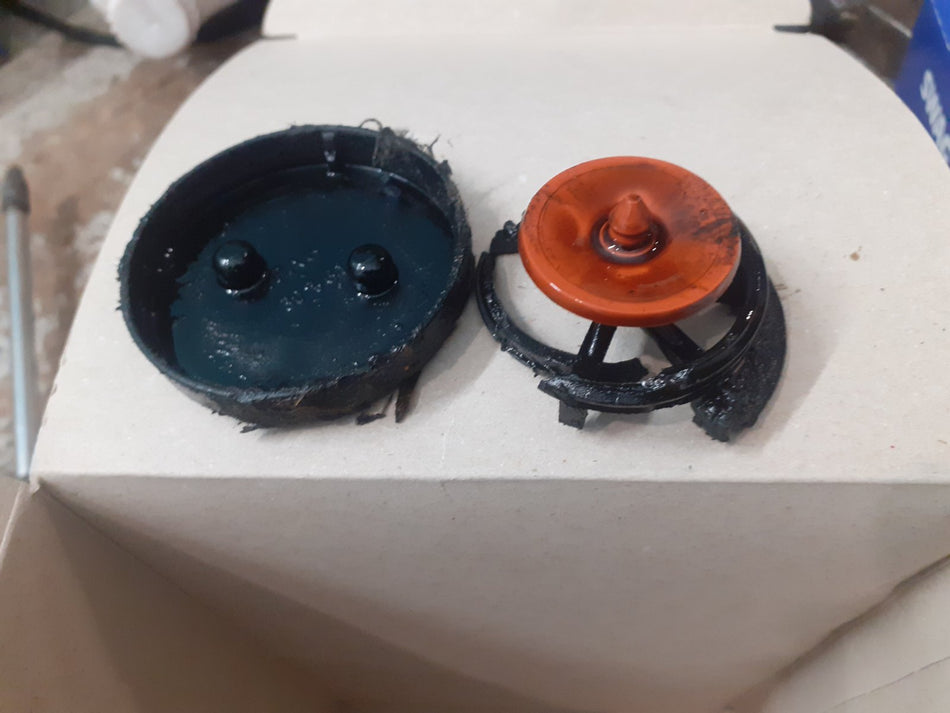
Primary mechanisms include thermal ageing (loss of elasticity), chemical attack by oil vapours, abrasive wear from soot, and mechanical overstress due to seized linkages. Secondary contributors are malfunctioning solenoids and collapsed hoses. Document the root cause before replacement to prevent recurrence.
Membrane Repair vs. Replacing the Intake Manifold
Repair with a diaphragm kit when the actuator housing, retainer, and linkage are undamaged, and bench testing isolates the diaphragm as the failure. Replace the actuator or intake manifold diaphragm when the housing is cracked, the mating faces are damaged, the linkages are broken, or the electronics are non-serviceable.
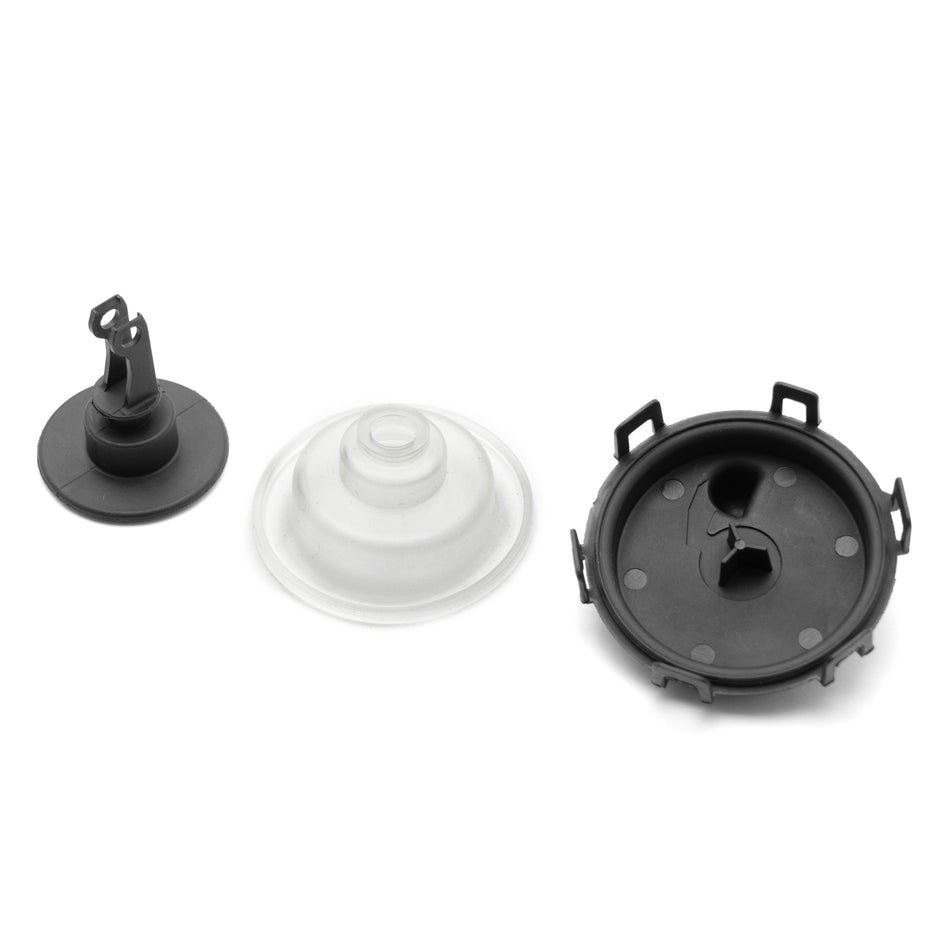
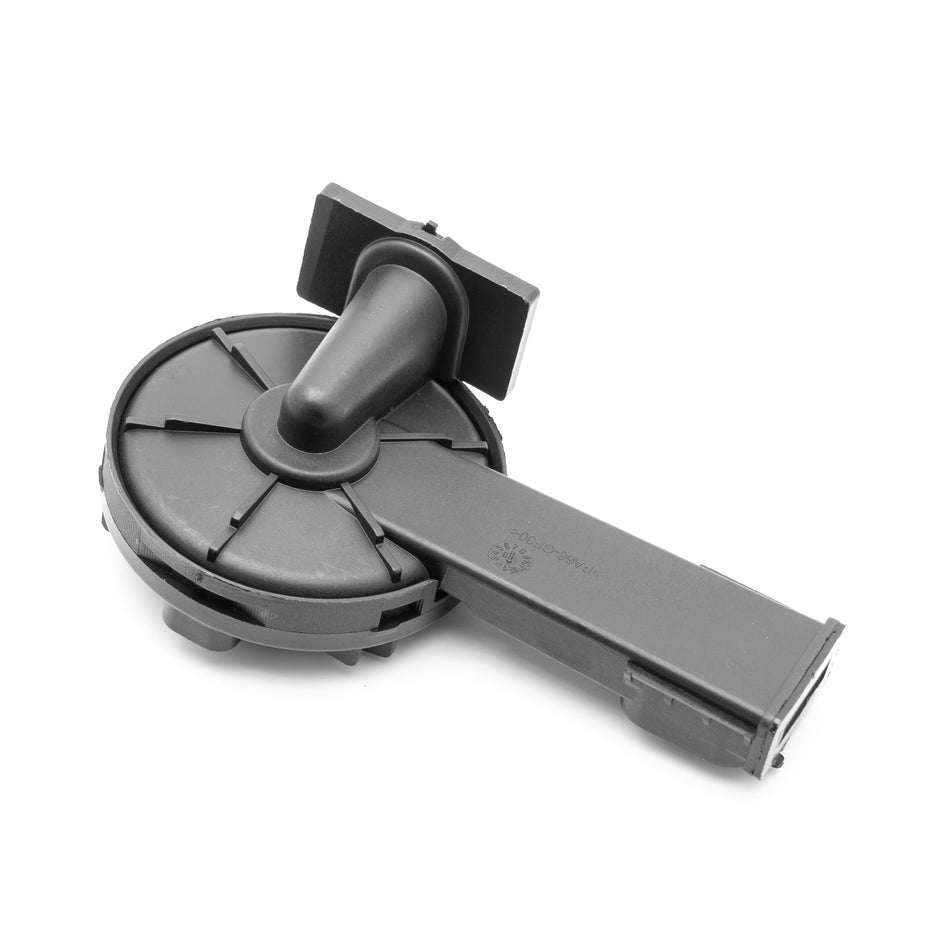
What’s Included in an Intake Manifold Actuator Membrane Kit
Depending on the actuator, a service kit may include the membrane or diaphragm, replacement sealing rings and O‑rings, and the retainer hardware (caps, plates, or clips). For certain models, kits may also provide small internal parts like springs or washers, and any required mounting gaskets.
Because parts can vary across revisions, always check the product details and exploded diagram. Match the OE or part number and, if needed, email VIN and part photos to support for a verified fitment.
How to Choose the Right Membrane
Matching saves time and money. Start with the part number of the intake manifold membrane diaphragm and cross-check with the engine code.
Match by Numbers
The fastest method is the OE number stamped on the actuator or listed in service documents, cross-referenced to the kit. When OE is missing, use VIN and engine code, watch for mid-year revisions that change ports or retainers. Compare photos, port layout, and connector orientation to be sure.
Before You Order
Before you order, collect VIN, engine code, OE number, or clear photos of the actuator, symptom notes, and any scan-tool readings. Send these to fitment support if you want confirmation.
Installation Overview
Open the actuator only in a clean area, remove carbon and old sealant from the seating surfaces, replace the intake manifold membrane and retaining hardware, and test the actuator off the car for travel and vacuum holding. Refit, reset the system, and road‑test to check for symptom resolution.
Safety note! Do not introduce debris into the intake system and avoid touching hot exhaust components; get professional help if you cannot bench test.
Intake Manifold Cost: Diaphragm Repair vs. Full Replacement
Labour access and diagnostic time dominate cost. Diaphragm kits are low-cost parts; however, inaccessible actuators and required carbon-cleaning can increase labour costs substantially. For procurement, stock common actuator revisions, and require technicians to record bench-test values on repair orders.
Buying Intake Manifold Membranes Online
Search by OE number or engine code and check the product diagram and photos. If in doubt, contact support with VIN and clear photos of the intake manifold actuator diaphragm and ports. Choosing the correct membrane kit the first time saves returns and downtime. For shops, order hub stock for common actuator revisions and keep diagnostic notes with each job.