EGR Membranes (Diaphragms) — Repair Kits & Replacement Parts
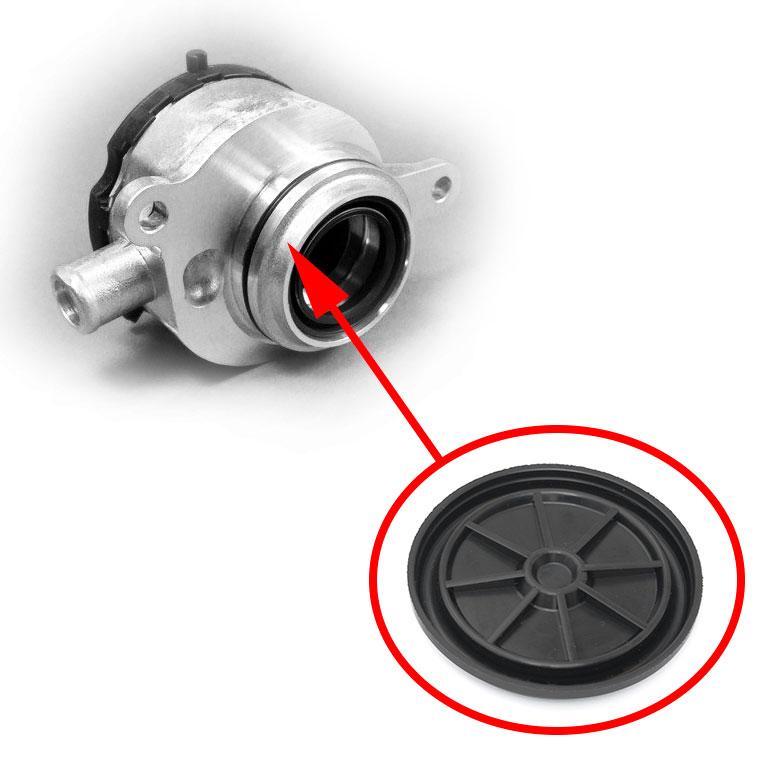
An EGR diaphragm is the thin, flexible membrane inside vacuum- or pressure‑actuated EGR components that seals and moves internal parts to meter exhaust recirculation. When the diaphragm tears or hardens, it causes vacuum leaks, stuck actuators, and misregulated EGR flow. Often, a targeted diaphragm replacement is far cheaper than replacing the entire valve:
-
Fitment-first: match by OE/part number, engine code, or valve model.
-
Fixes vacuum leaks, rough idle, and EGR control errors.
-
Intended for workshops and advanced DIYers who can confirm OE numbers.
Not sure which diaphragm you need? Contact support with VIN + OE number.
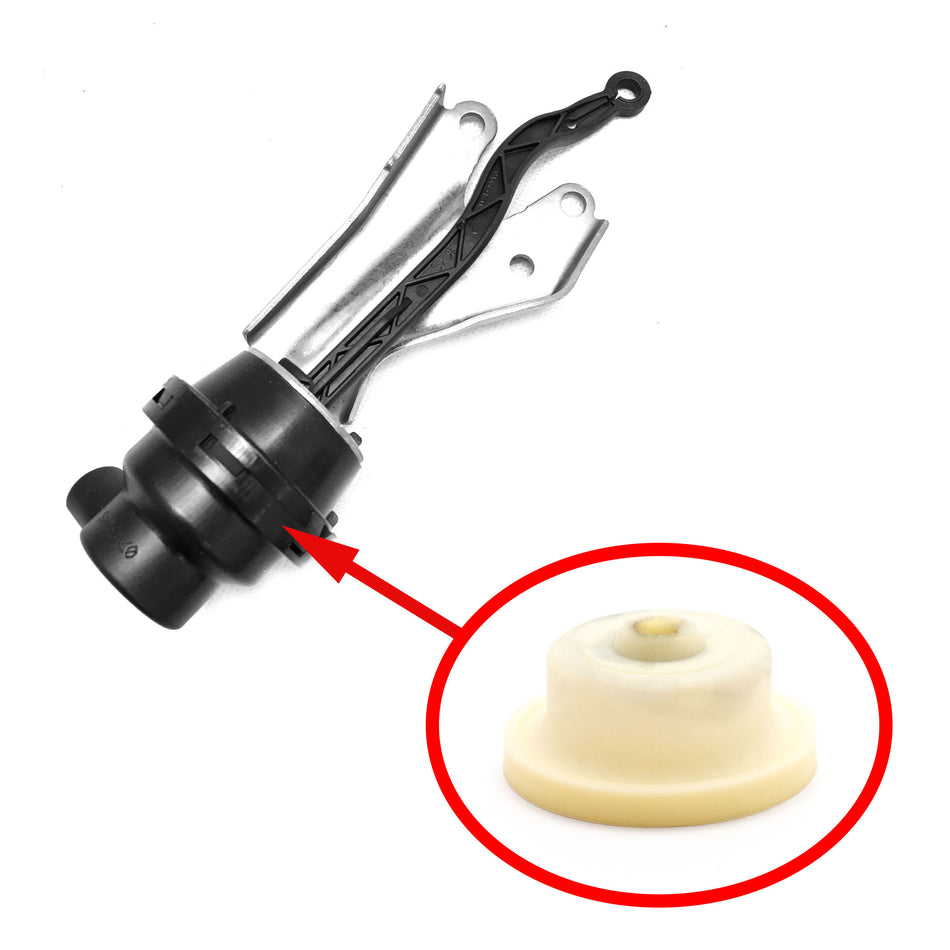
What is an EGR diaphragm (membrane) and what does it do?
The EGR diaphragm is the flexible element that translates vacuum or pressure into valve motion and sealing inside the EGR actuator or valve. A functional diaphragm keeps actuator response crisp, prevents unmetered flow, and helps maintain emissions and drivability.
EGR Diaphragm Symptoms
The EGR diaphragm is a relatively unnoticeable component compared to everything else under the hood. However, when something goes wrong, the first symptoms are “louder” than a Dodge or Ford Mustang engine:
-
Rough idle or stalling → vacuum leak or actuator not sealing.
-
Loss of power or hesitation → incorrect EGR flow, upsetting mixture and timing.
-
Hissing or whistling under the hood → torn diaphragm or poor housing seal.
-
Persistent EGR‑related fault codes → actuator not moving or vacuum not holding.
But what will you ultimately need? An EGR valve diaphragm or a complete kit? To avoid wasting money on unnecessary components (which still look good and don't need replacing), perform some tests.
First, check the vacuum lines/hoses and connectors, as this is usually where problems begin and where the necessary repairs become clear. Next, check for carbon buildup, perform a valve movement test, and conduct a smoke test. After that, you can order the components, because you know what you really need.
What causes EGR membrane failure?
The diaphragm membrane fails when it’s chemically damaged or physically overworked; address both the symptom and the feed that caused it. Typical causes:
-
Heat cycling → elastomer embrittlement.
-
Soot/carbon → mechanical binding and abrasion.
-
Oil contamination → solvent attack and swelling.
-
Pressure/backpressure events → tears or over‑stretch.
-
Bad vacuum control or hoses → rapid cycling/no hold.
Inspect and clean EGR passages, bench‑test the actuator with a hand pump, swap any soft/brittle vacuum hoses, and test the vacuum solenoid. Don’t fit a new diaphragm in the car until you’ve fixed the contaminated vacuum feed or blocked passage. Otherwise, it’s a short‑term fix.
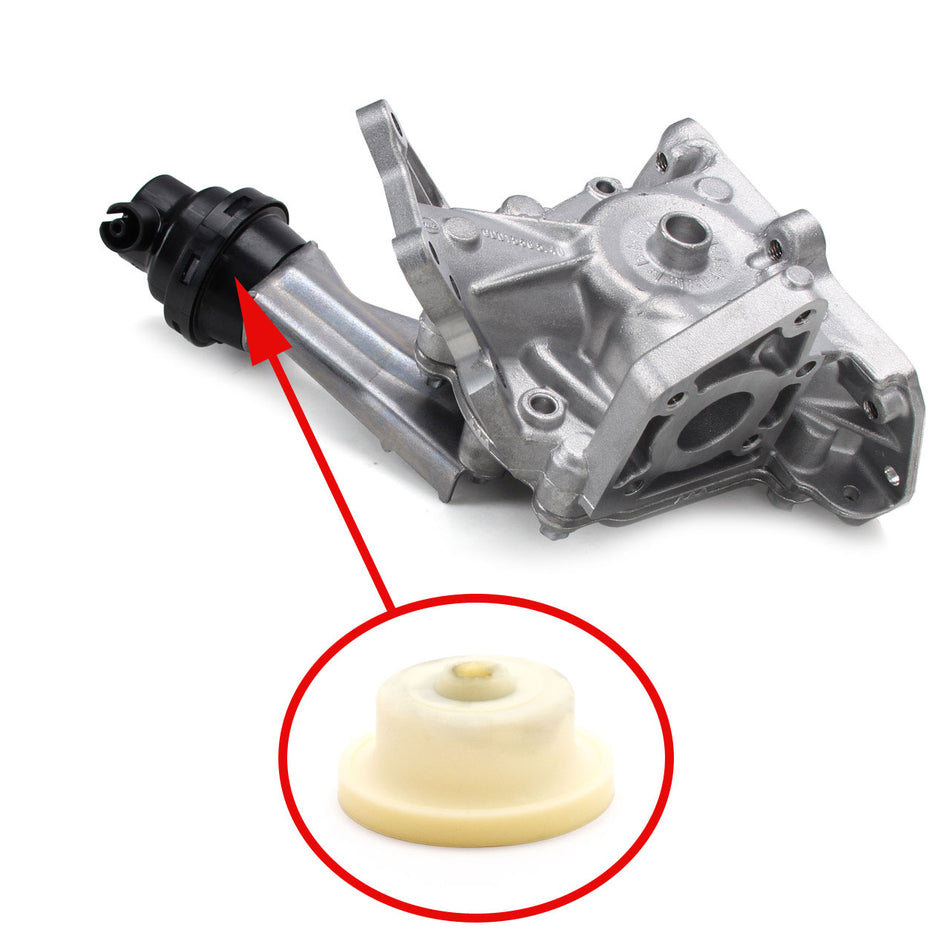
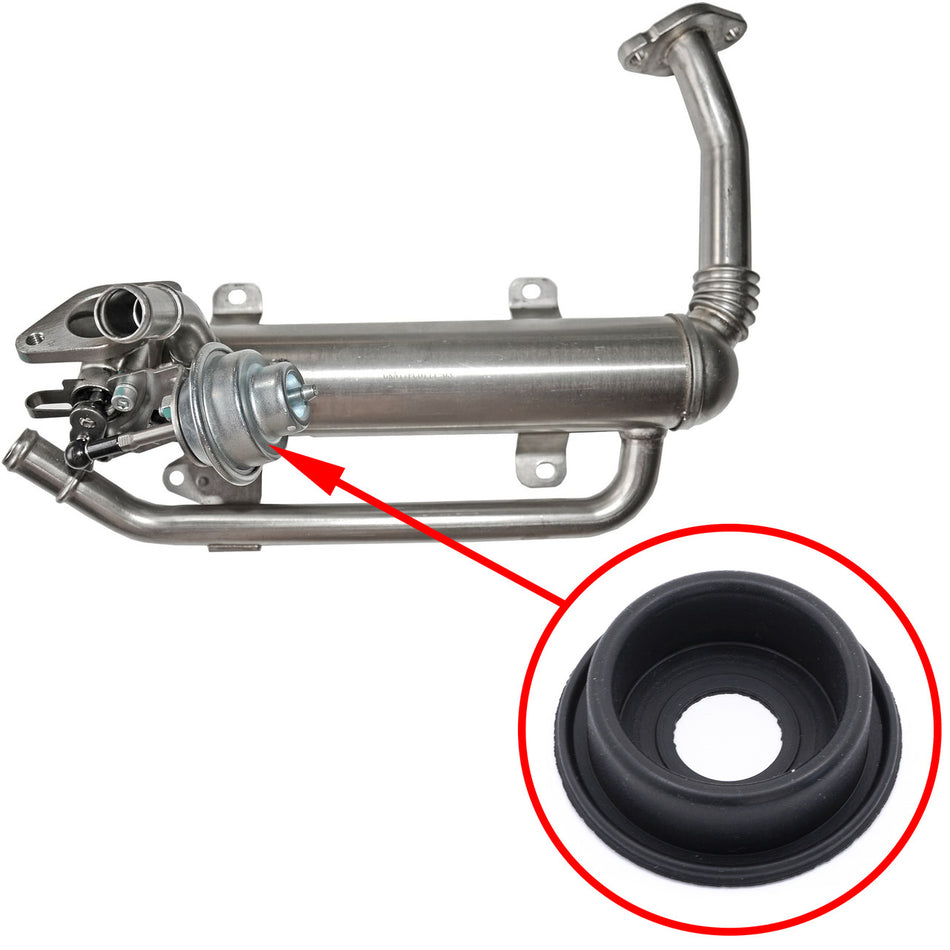
EGR membrane vs EGR pipe/tube
EGR diaphragm trouble and pipe/tube faults can produce similar symptoms, but they are different repairs. The diaphragm is inside the valve/actuator; the pipe or tube is the external exhaust conduit. If you hear a hiss at the actuator, see shredded rubber, or can’t hold a vacuum at the actuator, you need a diaphragm. If soot and exhaust odour appear at a flange or along a pipe, inspect the tubing and joints.
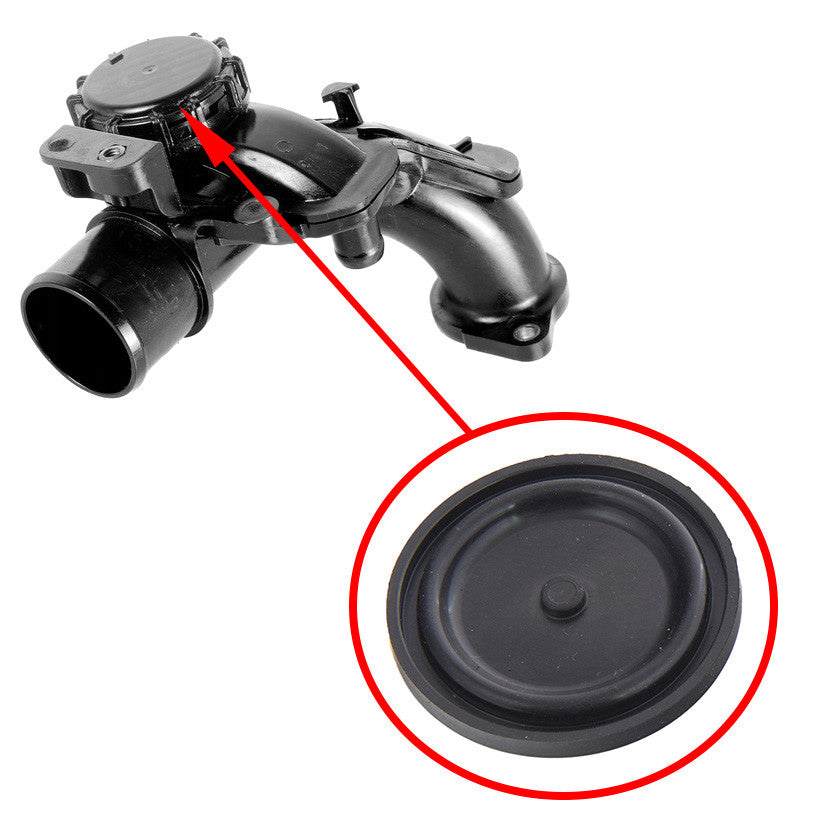
What’s included in an EGR valve repair kit
Kits vary by valve design; don’t assume every EGR repair kit contains the same parts. Contents may include the diaphragm, O‑rings or gaskets, retaining plates or caps, and, occasionally, small springs or washers. Some kits are diaphragm‑only; others are full-service kits with multiple seals.
Note! Always check the product page and parts diagram before you buy.
How to choose the correct EGR diaphragm/repair kit
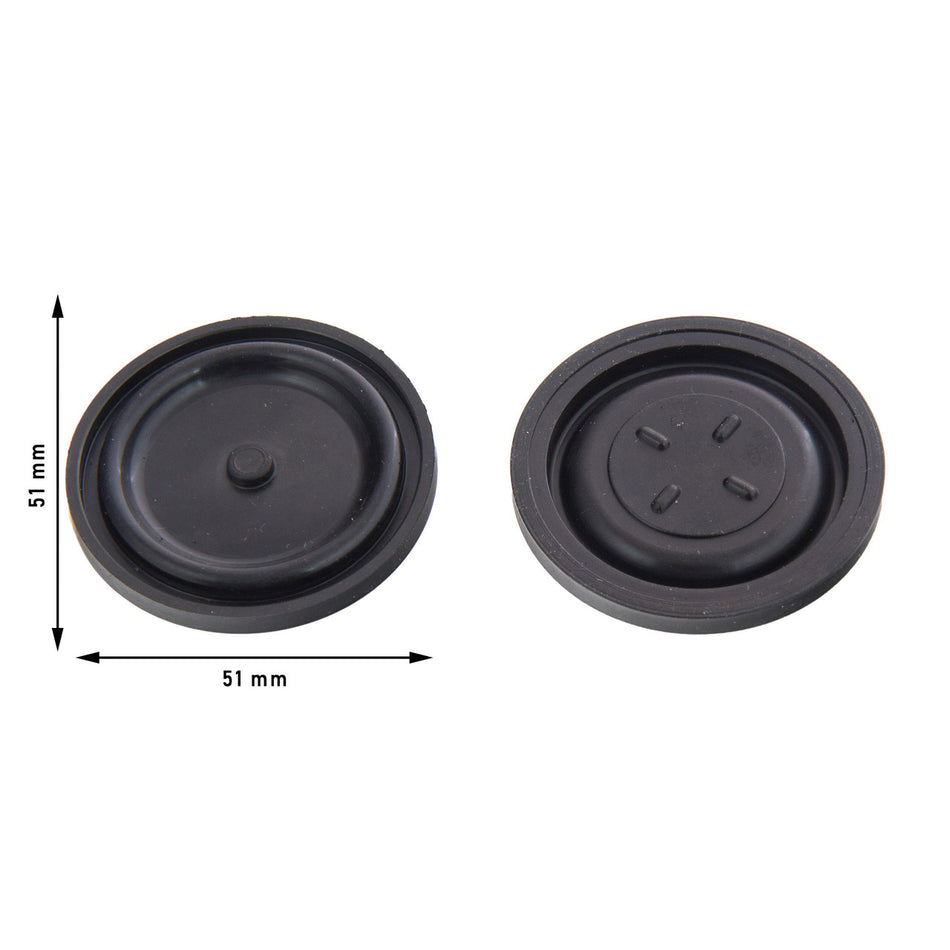
Before you click buy, confirm the part revision and the exact component you’re fixing. EGR diaphragm valves and actuators have many similar‑looking variants; small differences in port diameter, retaining plate shape, or gasket thickness make a kit unusable if it’s the wrong revision.
Match by OE / part number
The fastest, most reliable method is the OE/part number stamped on the valve or listed in OEM service docs. Cross‑reference that number against the kit description. If the old part uses a superseded number, check the manufacturer’s crosslist or send a photo to fitment support.
Match by vehicle + engine code + production year
When an OE number isn’t available, use VIN, engine code, and build date. Several manufacturers introduced mid‑year updates that change the EGR valve diaphragm or retaining method, so VIN lookup avoids surprises.
Confirm Component Type
Before you order, take a few minutes to gather these items:
-
VIN and engine code.
-
OE/part number from the old valve (or a clear photo of the valve body).
-
Photos showing the diaphragm area, connector type, and vacuum ports.
-
Symptom notes and any scan tool output (pump duty, EGR commanded vs actual).
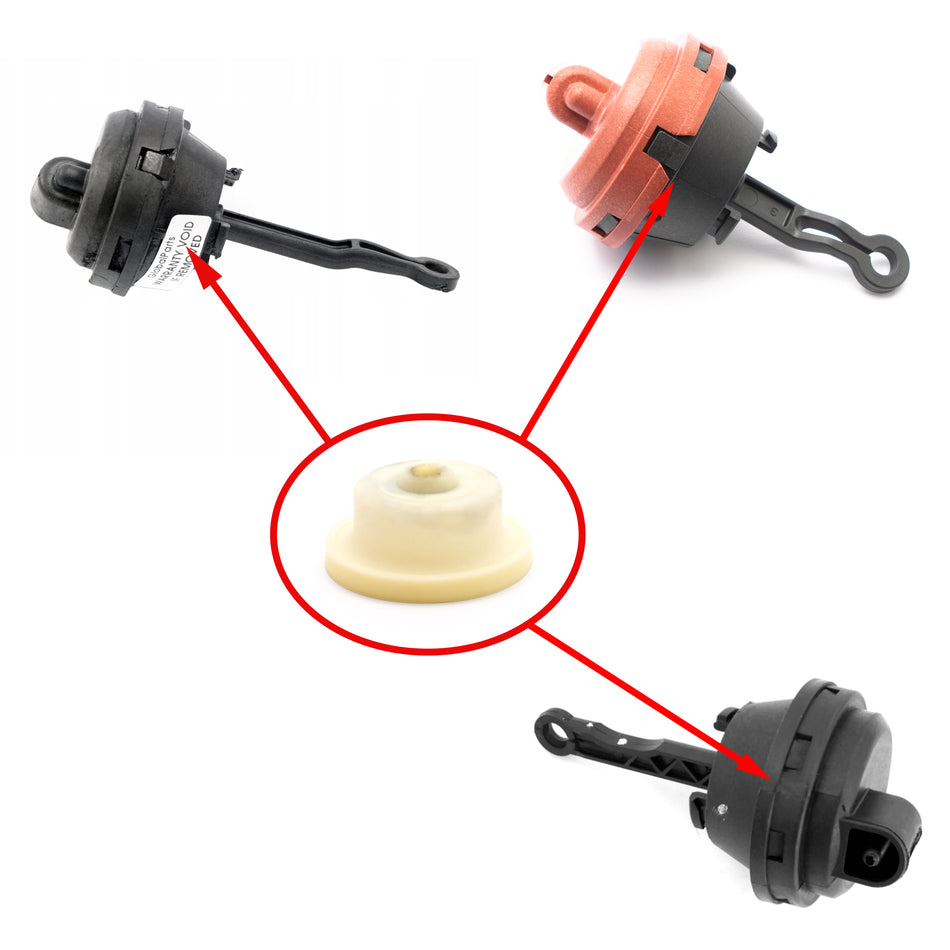
Do not assume the actuator contains an EGR diaphragm just because it looks similar. Compare the actuator design to product images: electric units have wiring and gear housings, vacuum units have nipples and rubber elements.
Prevent Repeat Failures
Fixing the diaphragm is only part of the job. Clean and correct the system to prevent future buildup. Remove carbon from EGR passages and ports, replace contaminated or soft vacuum lines, and test solenoids for proper operation. Check crankcase ventilation: oil‑laden vapour is a main enemy of diaphragms. Regular intake/EGR cleaning and proper oil service intervals dramatically reduce premature EGR membrane failure.
Buying EGR membranes online
Search by OE number or engine code and confirm kit contents before checkout. If in doubt, contact support with VIN + OE number and a photo. Add a concise symptom summary and any scan tool evidence, such as commanded EGR versus reported position or duty cycle readings. A targeted EGR diaphragm repair is cheaper than full valve replacement when the housing and actuator are serviceable.

 En existencia


